
How-to: Request a User Permission Change
Reading Time: ≈6 min
Introduction
Amelia's Product Support portal now has self-service capabilities. The process is end-to-end automated with Amelia guiding you through the steps. The benefits of Amelia's Product Support portal are significant. You don't need to fill in forms; instead, a quick conversation with Amelia creates a new ticket in AIOps. After that, you can check back in with Amelia as often as you like to get updates on the status of your ticket. Amelia is available round the clock.
As your team expands and your projects develop, you'll need added permissions in Amelia. Initiating a request for changes to one or many user accounts is now just a short conversation away. To access self-service support for Amelia, visit support.amelia.com.
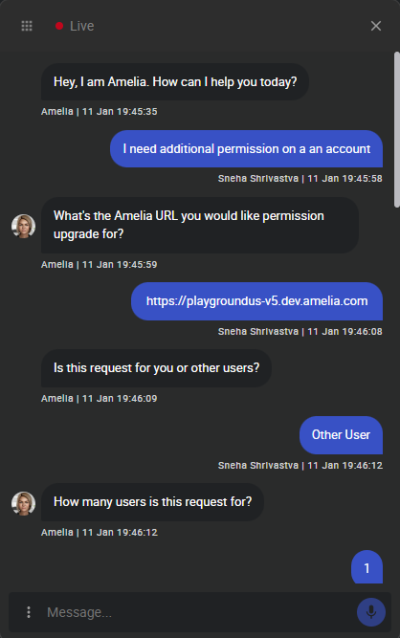
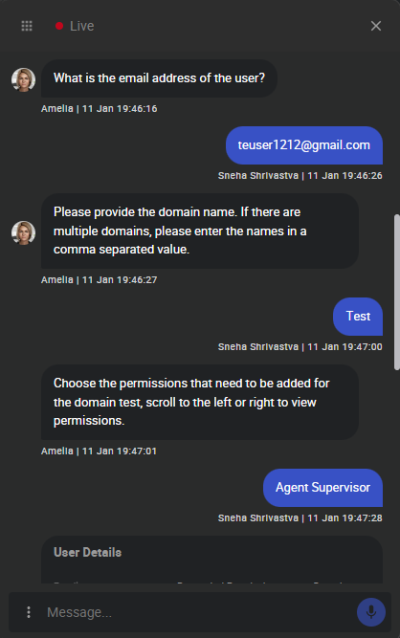
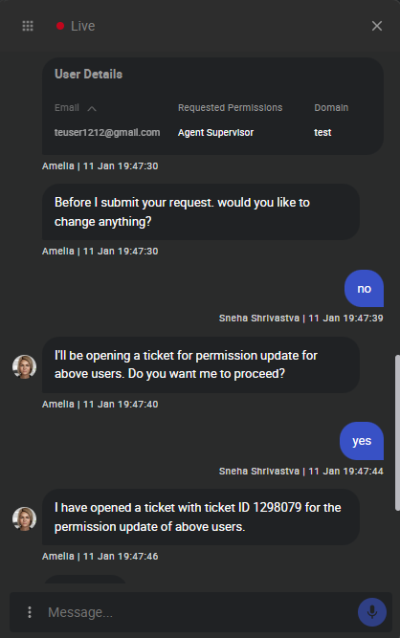
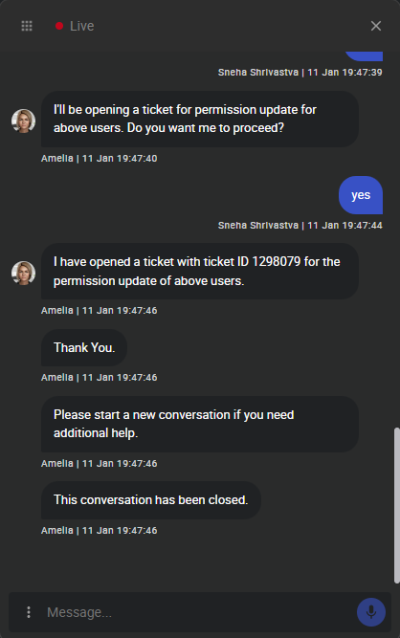
Figure 1. Sample Chat With Amelia - Single User Permission Change
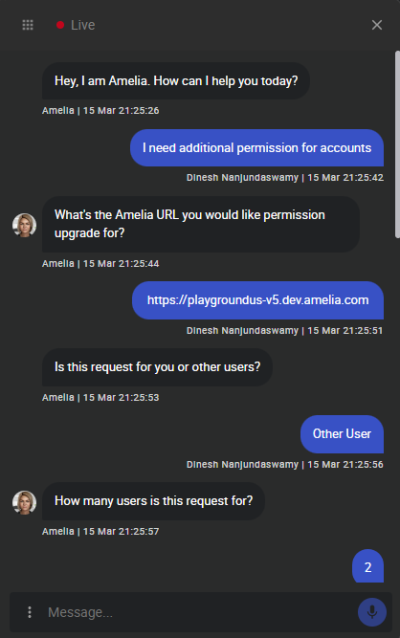
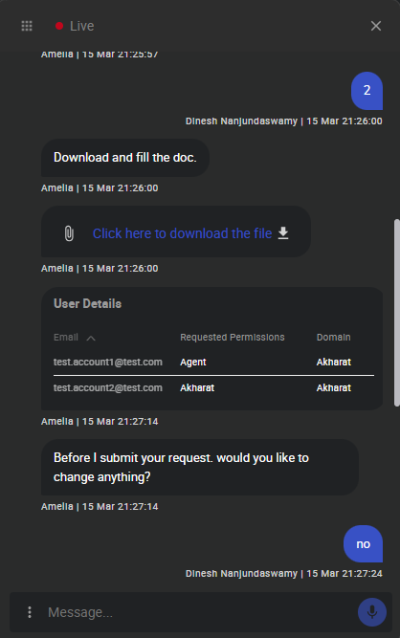
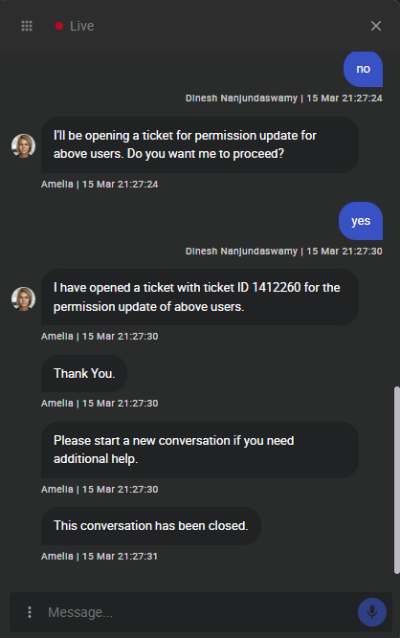
Figure 2. Sample Chat With Amelia - Multiple (Bulk) User Permission Changes
What You’ll Learn
In this topic you'll learn how to:
Requirements
To create one or more user accounts, you'll need:
-
The Amelia URL where the change is to be made.
-
Whether the user account is for yourself or someone else.
-
How many users to update with this request.
-
The email address for each user.
-
Permissions to be added.
Request a Single User Permission Change
Adding permissions to an Amelia user account, yours or another, is now just a short conversation away.
To update permissions on a single user account:
-
Using Google Chrome, go to https://support.amelia.com.
-
At the Login screen, enter your Email and Password.
-
Click Login. You're taken to Amelia's product support landing page.
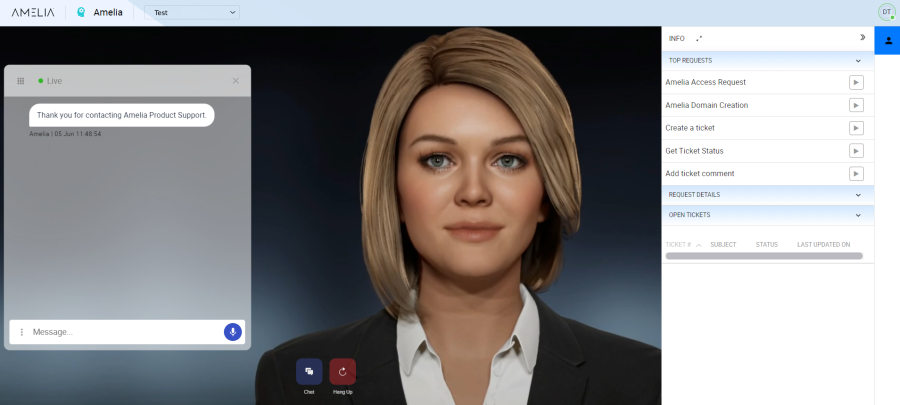
Figure 3. Amelia Product Support Portal Landing Page
-
In the Chat panel on the left, enter a phrase like add permissions.
-
Respond to Amelia's requests using the Requirements information that you gathered earlier.
TIP: In the Info panel, the Request Details, and Permission Update Details groups update to show relevant information and tips. Use these tips to guide you through the account update process.
-
Amelia will ask you to choose whether the role is for Self or Other User. You'll see options at the bottom of the chat panel, above the message area. Make a selection.
-
Amelia will ask how many users the request is for. Enter 1.
-
Amelia will ask you to choose the Permissions to be added for this user. You'll see a series of options at the bottom of the chat panel, above the message area. You can scroll left/right using the arrows. Click on one or more of these options to make a selection. Click Send Selected to submit your response to Amelia.
-
Administrator: Can manage domain configurations.
-
Agent: Can pick escalation from voice or chat.
-
Agent Supervisor: Can monitor and manage the escalation queue or team.
-
End User: Can initiate a conversation with Amelia.
-
Integration Designer: Can manage integrations, gateways, web services and adaptors.
-
Knowledge Designer: Can manage BPNs (business process networks), Digital Employee Builder, automations and workflows.
-
Power User: Read only access to the system.
-
RBAC Administrator: Can manage users.
-
-
-
Amelia will ask for permission to create a ticket for the request. Click Yes.
Amelia generates your ticket number and displays it in the Info panel under Open Tickets.
After submitting your request, it's reviewed and approved. Once approved, Amelia updates the permissions, and the user gets email confirmation.
Request Multiple User Permission Change
When you want to update permissions across many Amelia accounts at the same time, you can bulk update them.
To update permissions on multiple user accounts:
-
Using Google Chrome, go to https://support.amelia.com.
-
At the Login screen, enter your Email and Password.
-
Click Login. You're taken to Amelia's product support landing page.
Figure 4. Amelia Product Support Portal Landing Page
-
In the Chat panel on the left, enter a phrase like add permissions.
-
Respond to Amelia's requests using the Requirements information that you gathered earlier.
TIP: In the Info panel, the Request Details, and Permission Update Details groups update to show relevant information and tips. Use these tips to guide you through the account update process.
-
Amelia will ask you to choose whether the role is for You or Other Users. You'll see options at the bottom of the chat panel, above the message area. Make a selection.
-
Amelia will ask how many users the request is for. Reply with 2 or more.
-
Amelia will prompt you to download the Bulk_User_Permission_Modification.xlsx file. Open and enable the file for editing. Add your user details (User Email, Domain Name, Amelia V3 Roles, Time Zone and Concurrent Chats) one user per row. When you're done, drag and drop your completed Bulk_User_Permission_Modification file into the chat panel, and click Done.

Figure 5. Bulk_User_Permission_Modificaton.xlsx Sample File
-
-
Amelia will ask for permission to create a ticket for the request. Click Yes.
Amelia generates your ticket number and displays it in the Info panel under Open Tickets.
After submitting your request, it's reviewed and approved. Once approved, Amelia updates the permissions, and the user gets email confirmation.
More Resources
For more information, see:

